

What is Bridge
The Bridge widget is a drop-in bank connection flow that runs inside your application. Your customer chooses their bank, signs in, and picks an account. Straddle verifies the account and returns a paykey: a secure payment token that binds your customer’s verified identity to their bank account. You create charges and payouts with the paykey, so your application never handles raw account numbers. Every Pay by Bank payment starts with a paykey. Bridge is how you get one.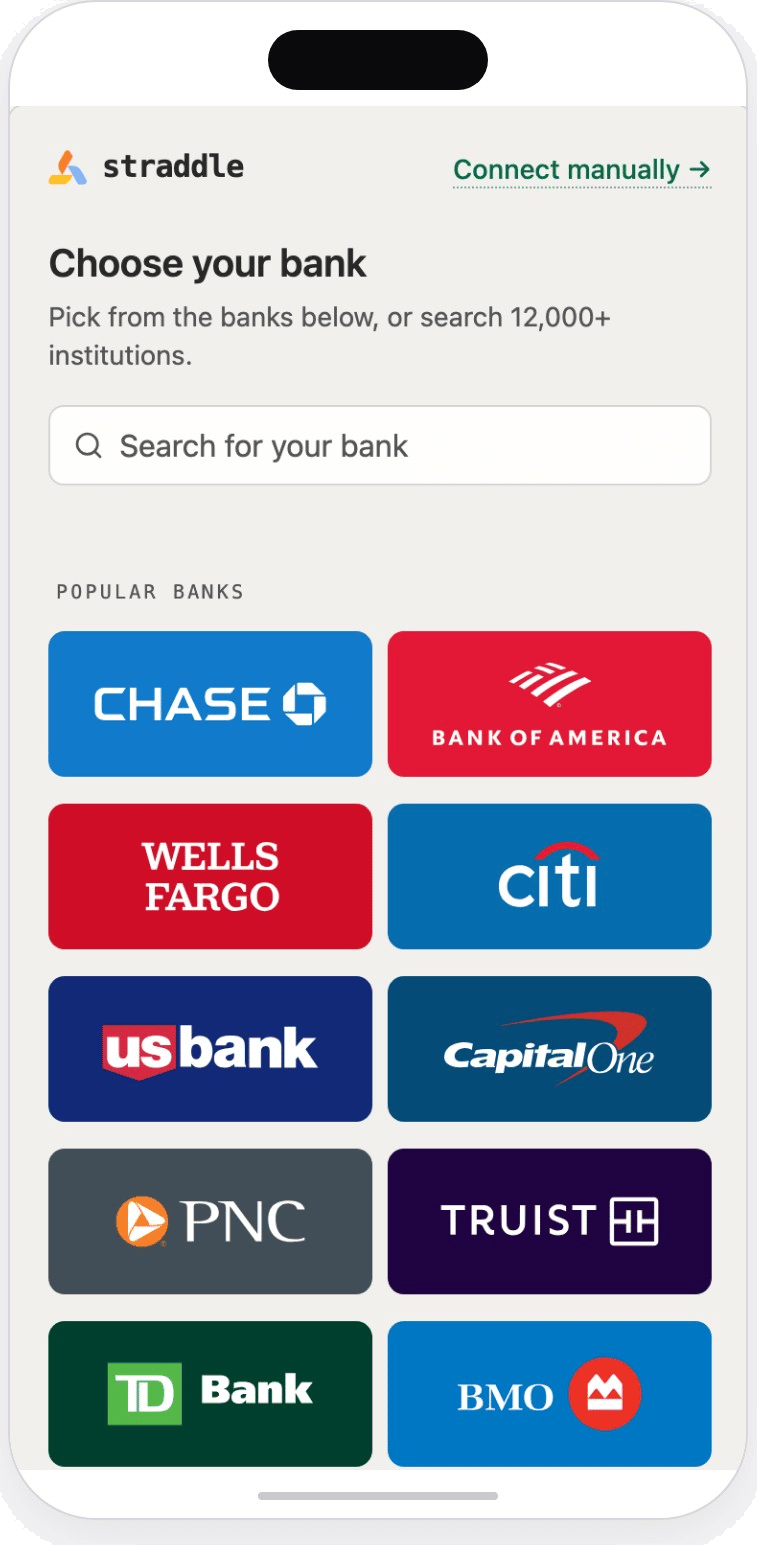
Customers search for their bank, pick a popular one, or connect manually.
- OAuth. The customer signs in on their bank’s own site and approves access. Bridge uses OAuth wherever the bank offers it.
- Credential login. At banks without OAuth, the customer signs in through a secure form inside the widget. The credentials never reach your servers or Straddle’s. If the bank asks security questions, the customer answers them in the widget.
- Manual entry. The customer types in a routing number and an account number. This covers accounts that a bank login can’t reach.
Quickstart
This quickstart runs in the sandbox. To go live, send the same requests tohttps://production.straddle.com and set mode="production" on the widget.
Before you start
You need a sandbox API key and a customer. Create a customer for the person or business connecting the account. The customer can’t beinactive or rejected.
Use the customer’s legal name. Straddle compares it with the names the bank holds for the account, so a nickname or a typo can send the paykey to review.
Add the Bridge snippet
Loadstraddle.js, then add a container for the widget. The script registers a <straddle-bridge> element, which renders Bridge in a frame on your page.
straddle-v1.js always serves the latest 1.x version of straddle.js, so your page gets fixes without a code change. A new major version gets a new file name, so a breaking change never reaches your page on its own.
The <straddle-bridge> element takes three attributes.
Attach your listeners before you add the widget to the page. Bridge reports setup problems, such as a missing
mode, as soon as the element is added.
Bridge is 720 pixels tall unless you give the element a height before you add it.
Create a Bridge token
Create the token on your server. Creating one takes your API key, which must never reach the browser. Create a new token each time a customer opens Bridge.client_secret. That’s your Bridge token. Send it to your page and pass it to openBridge.
- It’s opaque. Don’t decode it, store it, or log it.
- It lasts 4 hours from when you create it, in both production and the sandbox. It stops working at
expires_at. If it expires before the customer finishes, create a new token. - It creates at most one active paykey.
Straddle-Account-Id header. In the sandbox, add config.sandbox_outcome to force a paykey outcome. For every field, see Create a Bridge session.
Set the redirect URL
redirect_url is where the bank sends your customer after they approve access. It’s required, and it must be an absolute https URL. Straddle binds it into the Bridge token, so nothing on your page can change where the bank sends the customer.
Choose how Bridge opens the bank’s sign-in page before you add the widget. You set it once with the oauth-mode attribute, and Bridge doesn’t switch modes on its own.
- Pop-up (
oauth-mode="popup", the default): Bridge opens the bank’s sign-in page in a pop-up window. The pop-up closes when the customer finishes, and the redirect URL isn’t used. If the browser blocks the pop-up, Bridge asks the customer, on screen, to allow pop-ups to continue. - Redirect (
oauth-mode="redirect"): Bridge sends the whole page to the bank, and the bank sends the customer back to your redirect URL. Use this mode when pop-ups don’t work well, such as many in-app browsers on mobile.
- Create a Bridge token for the same customer.
- Add
<straddle-bridge oauth-mode="redirect">again, in the same browser tab.
Get the paykey back
When the customer selects Done on Bridge’s final screen, the widget firesstraddlecomplete. event.detail.data is the new paykey:
status before you continue. It has one of three values.
If Straddle rejects the account, Bridge tells the customer and lets them try another one. No
straddlecomplete event fires for a rejected paykey.
The browser event tells your page the customer finished, but it isn’t proof on its own. Before you rely on the paykey, confirm it on your server with GET /v1/paykeys/{id} or the paykey.created.v1 webhook.
Bridge fires two other events:
straddleexitfires when the customer leaves Bridge before finishing.event.detail.reasonmay say why.straddleerrorfires when something breaks, withevent.detail.codeandevent.detail.message.INVALID_TOKENmeans the token is missing or malformed. Check that you pass theclient_secretfromPOST /v1/bridge/sessionsunchanged.
Create a payment
Create a charge with the paykey. Amounts are in cents.Store the paykey for future use
A paykey is reusable. Save it once, and use it for every future charge and payout on that account. Your customer doesn’t reconnect for each payment. Store the paykey’sid and paykey values with the customer’s record. The paykey value is what creates payments, so keep it on your server and treat it like a credential. To look up a paykey later, call GET /v1/paykeys/{id}.
Balance checks
Watchtower, Straddle’s risk engine, can confirm your customer has the money before a charge goes out. When the balance is short, the charge fails before it reaches the bank, instead of coming back days later as a return. Setconfig.balance_check on each charge to one of three values.
A charge that fails a balance check has the reason
insufficient_funds.
Bank logins give Straddle the account’s live balance. Manual entry doesn’t, so a required check on a manual-entry paykey always fails.
For more information, see Balance verification.
Name matching
When your customer connects with a bank login, Watchtower compares the names on the bank account with your customer’s name. A match activates the paykey. A partial match or a mismatch sends it toreview, so the decision is yours instead of an automatic rejection.
Whether you see the names behind that decision depends on how the customer connected.
Manual entry still checks the account holder against your customer, as part of account validation. The bank returns no owner names on this path, though, so the review shows the decision without the evidence behind it: the name fields are
null.
To see what the bank returned, call Review a paykey. verification_details.breakdown.name_match holds the names on the account, the name Straddle matched, and a similarity score. To approve or reject a paykey in review, see the manual review process.
Next steps
- Paykeys: statuses, verification, and review.
- Sandbox testing for Bridge: test institutions and credentials for every connection path.
- Charges and payouts: move money with a paykey.
- Webhook events: follow paykey changes on your server.